Travis Picking
A Must Know Fun and Easy Fingerpicking Pattern
This lesson is part of a Free 3 part fingerpick series. If you enjoy the lesson, click the button for the other parts!
Register for FREE 3 Part Fingerpicking Series
Free 3 Part Series on Fingerpicking !
![]() We value your privacy and would never spam you
We value your privacy and would never spam you
The Fingerpick Hand (Right Hand for Right Handed Guitarists)
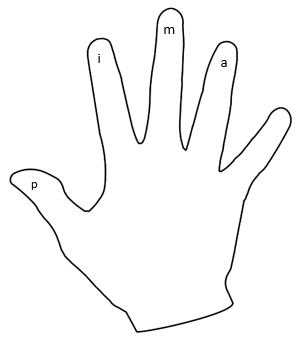
Our fingers will be labeled like this for our fingerpick hand:
p = thumb
i = index
m = middle
a = ring
Travis Picking
Travis picking is a style of picking named after Merle Travis. The basics of it will have us alternating between thumb and index and thumb and middle.
The pattern will look like this:
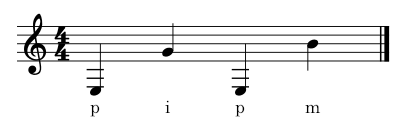
p i p m
That's it. We will repeat this pattern over and over while typically changing chords. With most Travis picking the thumb will alternate between two different bass notes and we will explore that in an upcoming lesson. For now to get the hang of the motion we will keep the thumb on one string (the Low E).
Start by Placing Fingers
Using just 3 strings we can start to get a feeling for Travis Picking. Usually with Travis picking the thumb will alternate between bass notes on two strings however let us start with keeping the thumb on just the low E string.
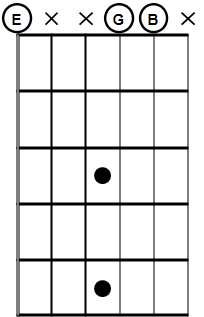
- Place thumb on low E string (6th string)
- Place index finger on G string (3rd string)
- Place middle finger on B string (2nd string)
Once your fingers are in place lets try the basic idea of Travis picking.
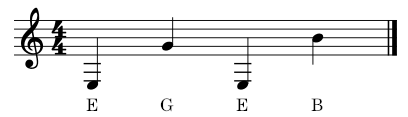
- Pluck the Low E with your thumb
- Pluck G string with your index
- Pluck your low E string with your thumb again
- Pluck your B string with your middle finger
That's it! You have the basics of Travis picking. Once you are feeling somewhat comfortable with this we will make it a little bit more challenging.